# CORS
# 原理简析
# 什么是 CORS
CORS 是一种基于 HTTP 头的 W3C 标准机制 (opens new window) 标准机制,全称是 "跨域资源共享" (Cross-origin resource sharing)。该机制使用额外的 HTTP 响应头来通知浏览器,一个页面是否允许访问来自不同源服务器上的资源,克服了 AJAX 只能使用同源的限制,从而实现跨域访问资源。
有关 CORS 更详细的介绍,请参阅该 MDN 文档 (opens new window)。
# 同源策略
同源策略是一种用于隔离潜在恶意文件并减少被攻击的重要安全机制。它限制了来自一个源的页面或其加载的脚本如何与来自另一个源的资源进行交互。例如,在一个页面中使用 AJAX 向不同源的 URL 发送请求,浏览器将检测到该请求来自不同的源(即跨域),则阻止该请求,并在控制台输出错误。
那么,什么是同源?简而言之,具有相同的协议、IP/域名和端口就可以被认为是同源。只要其中一项不同,则不是同源。下表给出了一些示例:
| URLs | 结果 | 原因 |
|---|---|---|
http://www.company.com/https://www.company.com/ | 不同源 | 协议不同 |
http://www.company.com/http://www.company.net/ | 不同源 | 域名不同 |
http://www.company.com/http://blob.company.com/ | 不同源 | 域名不同 |
http://www.company.com/http://www.company.com:8080/ | 不同源 | 端口不同 (http:// 默认端口是 80) |
http://www.company.com/http://www.company.com/blob.html | 同源 | 只有路径不同 |
http://www.company.com/blog/index.htmlhttp://www.company.com/blob.html | 同源 | 只有路径不同 |
http://192.168.0.1/http://192.168.1.1 | 不同源 | IP不同 |
# 两种 CORS 请求
浏览器将 CORS 请求分成两类:简单请求和非简单请求。
只要一个请求同时满足以下两个条件,就被视为简单请求:
- 请求方法是这三种方法之一:
HEAD,GET,POST. - HTTP 的头部信息不超出以下几种字段:
AcceptAccept-LanguageContent-LanguageLast-Event-IDContent-Type为以下三种之一:application/x-www-form-urlencoded,multipart/form-data,text/plain。
浏览器对这两种请求的处理是不一样的。
# 简单请求
对于简单请求,浏览器直接发出 CORS 请求,并在请求头中增加一个 Origin 字段。
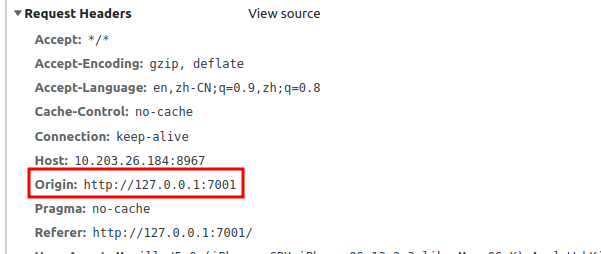
Origin 字段指明了本次请求来自哪个源 (协议、域名、端口), 服务器端可以根据这个值来设置 Access-Control-Allow-Origin 字段,告诉浏览器是否响应这次请求。
# 非简单请求
非简单请求与简单请求不同。当浏览器检测到非简单请求时,它会先自动发送一个 OPTIONS 请求,也就是预检(Preflight)请求。预检请求的目的是询问服务器端是否允许跨域,这样可以避免额外的计算逻辑。
当浏览器接收到预检请求的响应内容后,浏览器将根据响应头中的相关字段,如 Access-Control-Allow-Origin 和 Access-Control-Allow-Methods,来决定是否继续发送第二次请求。
# 几种典型的跨域错误
响应头没有包含
Access-Control-Allow-Origin:Access to fetch at 'http://127.0.0.1:8967/1.pdf' from origin 'http://127.0.0.1:7001' has been blocked by CORS policy: No 'Access-Control-Allow-Origin' header is present on the requested resource. If an opaque response serves your needs, set the request's mode to 'no-cors' to fetch the resource with CORS disabled.Access-Control-Allow-Origin格式错误:Access to fetch at '<AJAX请求目标源: 比如: http://192.168.0.1:8080>' from origin 'http://127.0.0.1:7001' has been blocked by CORS policy: The 'Access-Control-Allow-Origin' header contains the invalid value '<Access-Control-Allow-Origin 响应头内容>'. Have the server send the header with a valid value, or, if an opaque response serves your needs, set the request's mode to 'no-cors' to fetch the resource with CORS disabled.
Access-Control-Allow-Origin不匹配Access to fetch at 'http://127.0.0.1:8967/1.pdf' from origin 'http://127.0.0.1:7001' has been blocked by CORS policy: Response to preflight request doesn't pass access control check: The 'Access-Control-Allow-Origin' header has a value '<Access-Control-Allow-Origin 响应头内容, 比如:http://127.0.0.1:9999>' that is not equal to the supplied origin. Have the server send the header with a valid value, or, if an opaque response serves your needs, set the request's mode to 'no-cors' to fetch the resource with CORS disabled.Access-Control-Allow-Headers未设置Access to fetch at 'http://127.0.0.1:8967/1.pdf' from origin 'http://127.0.0.1:7001' has been blocked by CORS policy: Request header field range is not allowed by Access-Control-Allow-Headers in preflight response
# CORS 解决方案
解决 CORS 的方法有两种。一种是使用代理服务器来避免跨域问题,另一种是配置 CORS 规则。
# 使用代理服务器
代理服务器是客户端和目标服务器之间的中间服务器,可以用于请求第三方 URL 资源。由于请求是由代理服务器发起的,浏览器不会遇到 CORS 问题。我们可以自己搭建代理服务器或使用第三方代理服务器。这里我们介绍使用 nginx 和 node.js 配置代理服务器的方法。这两种方法实现了相同的功能,即将 /prefix/* 的请求代理到第三方服务器 http://third_party.file.server,同时从原始路径中删除 /prefix 前缀。例如,http://location:3000/prefix/path/to/some.pdf 请求代理后的 URL 为 http://third_party.file.server/path/to/some.pdf。
# Nginx 配置代理服务器
Nginx 是一个高性能的 Web 服务器,可以用作代理服务器。以下是在 Nginx 中配置代理服务器的方法。
打开 Nginx 配置文件(通常位于 /etc/nginx/nginx.conf,具体取决于服务器环境),找到对应的 server 块,并添加以下代码:
location ~* ^/prefix/(.*) {
    proxy_pass http://third_party.file.server/$1$is_args$args;
    proxy_redirect off;
}
在上述代码中,Nginx 在接收到路径以 /prefix 开头的请求时,首先构造正确的文件 URL 路径,然后将请求代理到第三方文件服务器。
# Nodejs 配置代理服务器
以 Express, Koa, 和 NestJS 为例。
Express
Express 可以使用第三方中间件
http-proxy-middleware来实现代理,并利用 Express 的路由功能将以 prefix 开头的请求代理到第三方文件服务器:const express = require('express'); const { createProxyMiddleware } = require('http-proxy-middleware'); const app = express(); app.use('/prefix', createProxyMiddleware({ target: 'http://third_party.file.server', changeOrigin: true, pathRewrite: { ['^/prefix']: '' } }));这段代码在接收到路径以
/prefix开头的请求时,会替换路径中的/prefix/,并将请求转发到 target URL。更多用法,请参阅 https://www.npmjs.com/package/http-proxy-middleware (opens new window)。Koa
Koa 需要使用第三方中间件 koa-proxy 来实现代理:
const Koa = require('koa');
const proxy = require('koa-proxy');
const app = new Koa();

app.use(
    proxy('/prefix', {
        host: 'http://third_party.file.server',
        match: /^\/prefix\//,
        map: function(path) {
            return path.replace('/prefix', ''); // 替换掉路径中的 /prefix 前缀
        }
    })
)
更多用法,请参阅 https://www.npmjs.com/package/koa-proxy (opens new window)。
NestJS
与 Express 类似,NestJS 可以使用第三方中间件
http-proxy-middleware来实现代理:import { NestFactory } from '@nestjs/core'; import { AppModule } from './app.module'; import { createProxyMiddleware } from 'http-proxy-middleware'; async function bootstrap() { const app = await NestFactory.create(AppModule); // Proxy endpoints app.use('/prefix', createProxyMiddleware({ target: 'http://third_party.file.server', changeOrigin: true, pathRewrite: { [`^/prefix`]: '', } })); await app.listen(3000); } bootstrap();这段代码与 Express 示例具有相同的效果。
# 配置 CORS
在 Foxit PDF SDK for Web 中,PDFViewer.openPDFByHttpRangeRequest (opens new window) 接口经常会遇到跨域问题。为了提高打开 PDF 文档的速度并减少文件服务器的带宽,该接口会在发送 PDF 文件请求时向文件服务器发送带有 Range 请求头的请求。在接收到响应后,需要根据Content-Range 响应头来计算文件的总大小。因此,在配置 CORS 时,至少应包含以下三项。
Access-Control-Allow-Headers: Range;
Access-Control-Allow-Origin: *; // 为了安全考虑,建议和请求头中的 Referer 的值相同
Access-Control-Expose-Headers: Content-Range; // 只有加入这里的响应头 key,才能被 JS 获取到响应头的值
下面将列举几个不同场景下的配置方法。
# Web 服务器配置 CORS
Nginx 配置 CORS
在 nginx.conf (一般目录是
/etc/nginx/nginx.conf) 文件中添加下面的节点:server { listen 8967; server_name 127.0.0.1; charset utf8; location / { root "/path/to/files/directory/"; if ($request_method = OPTIONS) { add_header 'Access-Control-Allow-Headers' 'Range'; add_header 'Access-Control-Allow-Origin' '*'; add_header 'Access-Control-Expose-Headers' 'Content-Range'; return 204; } add_header 'Access-Control-Allow-Headers' 'Range'; add_header 'Access-Control-Allow-Origin' '*'; add_header 'Access-Control-Expose-Headers' 'Content-Range'; } }上述配置允许所有站点跨域访问资源,这是一种非常不安全但省事的做法。在实际应用场景中,应该添加限制,例如根据访问的源设置是否允许跨域。方法如下:
添加 $cors 变量,并使用 $http_origin 判断是否为合法的源。以下代码将允许 foxit.com 的所有子域名跨域访问资源:
map $http_origin $cors {
    '~*^https?://.*.foxit.com$' 'true';
}
添加 $allow_origin 变量。如果 $cors 的值为 'true',则表示该请求为跨域请求,然后响应
Access-Control-Allow-Origin的值。map $cors $allow_origin { 'true' $http_origin; }同样,在进行跨域请求时,可以指定
Access-Control-Allow-Headers响应头。map $cors $allow_headers { 'true' 'Range'; }最后,整合所有配置。
map $http_origin $cors {
    '~*^https?://.+.foxit.com$' 'true';
}
map $cors $allow_origin {
    'true' $http_origin;
}
map $cors $allow_headers {
    'true' 'Range';
}
map $cors $allow_expose_headers {
    'true' 'Content-Range'
}
server {
    listen 8967;
    server_name 127.0.0.1;
    charset utf8;
    location / {
        root "/path/to/files/directory/";
        if ($request_method = OPTIONS) {
            add_header 'Access-Control-Allow-Headers' $allow_headers;
            add_header 'Access-Control-Allow-Origin' $allow_origin;
            add_header 'Access-Control-Expose-Headers' $allow_expose_headers;
            return 204;
        }
        add_header 'Access-Control-Allow-Headers' $allow_headers;
        add_header 'Access-Control-Allow-Origin' $allow_origin;
        add_header 'Access-Control-Expose-Headers' $allow_expose_headers;
    }
}
为了确保修改正确,我们建议先运行
nginx -t以检查修改后的配置是否存在错误。如果没有错误,再运行nginx -s reload来重新加载 Nginx 服务。Tomcat 配置 CORS
以下是一个简单的 CORS 配置示例。您也可以参阅 Tomcat 的官方文档:http://tomcat.apache.org/tomcat-7.0-doc/config/filter.html#CORS_Filter (opens new window)。
<filter>
    <filter-name>CorsFilter</filter-name>
    <filter-class>org.apache.catalina.filters.CorsFilter</filter-class>
</filter>
<init-param>
    <param-name>cors.allowed.origins</param-name>
    <param-value>https://*.foxit.org</param-value>
</init-param>
<init-param>
    <param-name>cors.allowed.headers</param-name>
    <param-value>Range</param-value>
</init-param>
<init-param>
    <param-name>cors.exposed.headers</param-name>
    <param-value>Content-Range</param-value>
</init-param>

<filter-mapping>
    <filter-name>CorsFilter</filter-name>
    <url-pattern>/*</url-pattern>
</filter-mapping>
Apache 配置 CORS
在 Apache 中,我们可以通过在服务器配置中的
<Directory>、<Location>、<Files>或<VirtualHost>部分添加以下规则来启用 CORS,这些配置通常位于 httpd.conf 或 apache.conf 文件中:Header set Access-Control-Allow-Origin '*'; Header set Access-Control-Allow-Headers 'Range'; Header set Access-Control-Expose-Headers 'Content-Range';也可以在 .htaccess 文件中添加下面的代码:
<IfModule mod_headers.c>
    Header set Access-Control-Allow-Origin '*';
    Header set Access-Control-Allow-Headers 'Range';
    Header set Access-Control-Expose-Headers 'Content-Range';
</IfModule>
为了确保修改正确,我们建议先运行
apachectl -t以检查修改后的配置是否存在错误。如果没有错误,再运行sudo service apache2.conf或apachectl -k graceful来重新加载 Apache 服务。备注:您也可以使用
add命令代替set命令,但使用add可能会导致头信息被多次添加。因此,最安全的方法是使用set。IIS 配置 CORS
IIS6 和 IIS7 版本的配置方法不同。在进行配置之前,请先确认您当前正在使用的版本。
- IIS6
打开 IIS,选择您需要配置的站点,右键单击以打开属性对话框。选择 'HTTP Headers' 选项卡,点击 'Add' 按钮,然后分别添加以下响应头:
Access-Control-Allow-Headers: 'Range',Access-Control-Allow-Origin: *,Access-Control-Expose-Headers: Content-Range。- IIS7
请将以下配置合并或添加到您的站点配置文件中 (即 web.config 文件。如果您没有这个文件,可以创建一个新的):
<?xml version="1.0" encoding="utf-8"?>
<configuration>
<system.webServer>
<httpProtocol>
    <customHeaders>
    <add name="Access-Control-Allow-Origin" value="*" />
    <add name="Access-Control-Allow-Headers" value="Range" />
    <add name="Access-Control-Expose-Headers" value="Content-Range" />
    </customHeaders>
</httpProtocol>
</system.webServer>
</configuration>
# 云存储资源配置 CORS
市场上有许多云存储和 CDN 服务,其中大部分都在官方文档中提供了相应的配置方法。以下仅列举了一些示例:
- Alibaba Cloud: https://www.alibabacloud.com/help/en/object-storage-service/latest/configure-cors (opens new window)
- Tencent Cloud: https://www.tencentcloud.com/document/product/436/13318 (opens new window)
- Google Cloud: https://cloud.google.com/storage/docs/using-cors (opens new window)
- Azure Storage: https://learn.microsoft.com/en-us/rest/api/storageservices/cross-origin-resource-sharing--cors--support-for-the-azure-storage-services (opens new window)
- AWS S3: https://docs.aws.amazon.com/AmazonS3/latest/userguide/cors.html (opens new window)
# 在服务端框架中配置 CORS
- Node.js 相关框架
- Express: 请参阅 express cors middleware (opens new window)
- Koa: 请参阅 @koa/cors (opens new window)
- NestJS: 请参阅 CORS|NestJS (opens new window)
- SpringBoot (java) 框架:请参阅 Enabling Cross Origin Requests for a RESTful Web Service (opens new window)
- Django (python) 框架:请参阅 django-cors-headers (opens new window)
- Laravel (php) 框架:请参阅 laravel-cors (opens new window)